
Spring is in the air, can you feel it?
One of the best ways to make the most of the season (instead of rotting in bed) is hosting a picnic with your friends. The only problem is that it can get overwhelming –and expensive– to buy all that you need. But no need to stress, there’s no better crowd-pleaser than a charcuterie board. Easy, inexpensive, attractive to the eye, delicious and anything but boring. You can get away with a smaller shopping list, use what you have at home, or both!
Before heading out door, do this first:
- Have a vision
If you shop casually and grab whatever you want into the cart, it’s great to have an idea of what you want beforehand; it’ll save you money and time. Sometimes we get carried away when we see a full basket.
Here are some things you might want for your scrumptious spread:
- Cheese
- Cured meats (think salami, prosciutto, etc. You might want to spend less or forego it if the wallet is lighter.)
- Nuts
- Seeds
- Crackers
- Fruits
- Vegetables (these are typically used more as a garnish)
- Herbs (garnishes, unless you like to eat raw dill)
- Sauces
- Spreads/dips (get bowls too, obviously)
If none of these sound right, you can go the non-traditional route. Consider having a “sweets-board” with popcorn, chocolate, sprinkles and more! Or add different types of starches in place of crackers, like brioche and sourdough. And garnishes could basically be anything, as long as they’re edible (there are lots of edible flowers).
Whatever you envision in your head, you should follow through.
While I’m sure anyone can think of at least one thing, sometimes exhaustion or stress from the week before can make the brain a little foggy. If you’re still unsure or don’t care, we’ve got some cheese and fruit pairings for you to try out:
- Brie, strawberry and pistachio
- Cheddar, apple, walnut
- Goat cheese, grapes, walnuts
- Blue cheese with figs
- Gouda with apricots/peaches
Speaking of pairings, you should know what you’re working with. For example, some cheeses are delightful when paired with grapes, but many others would make you want to vomit if eaten with the fruit. But of course, since everyone has different taste buds, it’s up to you to decide what’s best, just remember that there’s a reason why some pairings are less popular than others.
Once you have your items, all that’s left is the arrangement. Follow the steps below for an Instagram story that’s going up in no time.
2. Sizing
For most boards, there should be a variety in sizes. Think of sizing as a spectrum. There should be a couple of items closer to the opposing extremes, with the majority of them somewhere in the middle. This ensures that it’s visually appealing and not boring. So when shopping, don’t shy away from purchasing that wheel of camembert.
There is one exception to this rule, and that’s if you didn’t look at rule #1 and bought everything your heart desired (just joking). Having a lot of items (likely 14+) would leave little room for wheels of cheese the size of your hand. Keep the sizes as uniform as possible to make sure it doesn’t get messy. You can chop up your cheeses, stack the crackers or pile the berries together to limit the space they take up.
3. Placement
Arguably the hardest part of the process. To make things less overwhelming, place the biggest items first, leaving the board with spaces for fillers. Everything falls into place when the canvas is half-finished (see the link for a visual).
4. “Styling”
There’s nothing wrong with stacking the meat into a neat pile and tucking it into a corner of the board, but you’ll lose originality points. For an unforgettable visual, experiment with different folds and shapes to create a unique look. Don’t be afraid to stack things on top of each other or cut them into different shapes. Creating depth creates “character,” it makes the food more interesting to look at, so think outside the box. Sometimes, the craziest ideas might just be your best one yet.
5. Colors and values
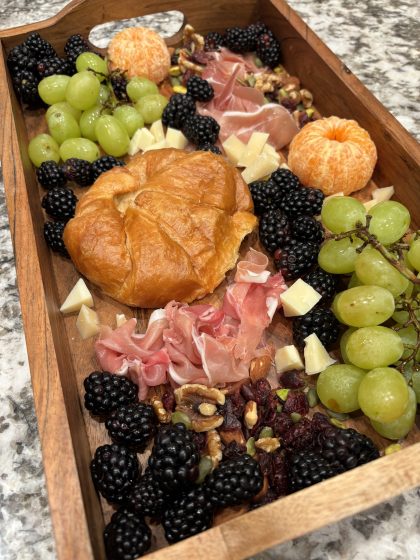
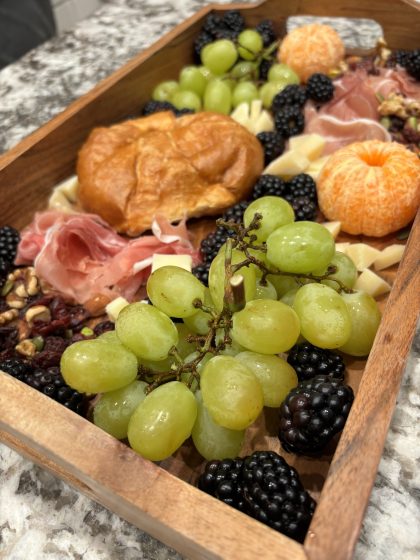
Assuming the main pieces are already in place, you might add garnishes, fillers or anything that you have at home. If so, keep the colors in mind. A myriad of shades and values add an eye-captivating appeal that can please even the pickiest of eaters. This means you need to consider lights and darks, colorful vs. dull, etc. Light colors are best with similar shades, same for darker colors and the like.
Don’t add anything that would clash with the rest of the food to avoid extremes. For example, blackberries don’t mesh well with brie, prosciutto roses, green grapes, raspberries or pistachios, which had a lighter color palette. The berries would add pockets of darker hues juxtaposed to the brighter hues of the board, making them stand out, but in the same way that gold does on cool-toned skin. In other words, in a glaringly unflattering way.
However, if that same board also had some black and green olives and black pepper table crackers, a few pieces wouldn’t hurt. That’s because darker items can balance out an overwhelmingly red and green board, lowering the high contrast to somewhere in the middle.
So when considering color, either have a lot of hues to balance each other out, or stick to a palette.
Final thoughts
Regardless of how it turns out, it needs to be said that you don’t have to do any of this. No one is taking away your cheesemonger license if you pair blue cheese with grapes. Neither will anyone notice if those orange slices are the only pop of color in a sea of beige. What you’d miss out on is the fun. It’s way more exciting to make salami “caterpillars” snaking around that bowl of hummus than stacking them like coins in one corner.
A charcuterie board shouldn’t feel like a chore or a stressful project. Rather, it’s a chance to show off your artistic abilities while doing something for your friends. At the end of the day, do what you want, whether that’s copying from Pinterest or following the rules here. But if you have leftover time in your day, consider spending just a little more on your board to make it special.
Whoever it’s for, they’ll appreciate the effort you’ve put into it.